Integrating Apache Tomcat in Eclipse
So I put this huge idea of mine (an exaggeration really) into a web app and wanted to run it on Tomcat. However, exporting the project to WAR file, deploying it on Tomcat and starting the web server was too much to do every time I made a simple change in the project. So I decided to configure the server inside Eclipse so that deploying and running the project on Tomcat was just a couple of clicks away now. Here’s how I did it:
- Click on Window menu and choose Preferences option from it. Out of the options available in left panel, select Server → Runtime Environments. The window should appear as below:
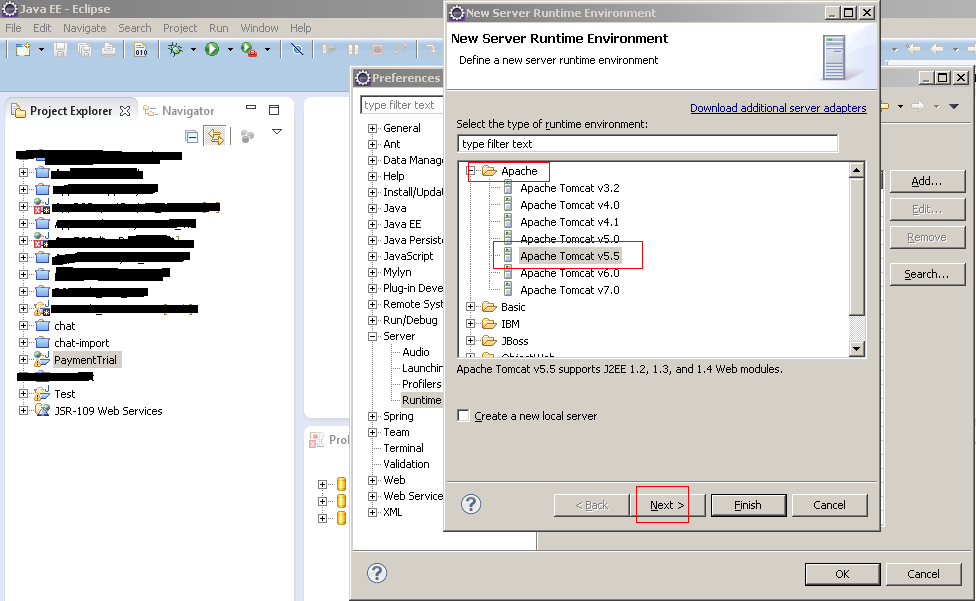
- Click on Add… button. From the new menu that appears, expand Apache option and select the appropriate version of your Tomcat server. As shown below:
- Click “Next >” button. Eclipse gives a default name to the new server run-time configuring you are creating now. I prefer to leave it as is (which in current case is Apache Tomcat v5.5). Next option is to choose the Tomcat installation directory. Click on Browse button and select the location of the installation directory where Tomcat is installed. This directory should be the one inside which “bin, conf” etc folders are present (in my case this directory path is: “D:Softwaresapache-tomcat-5.5.27”. The last option is to define the Java Runtime Environment (JRE). Most likely, if you are reading this post, this would be already configured on your system. I prefer to stay with the workbench default JRE. As shown below:
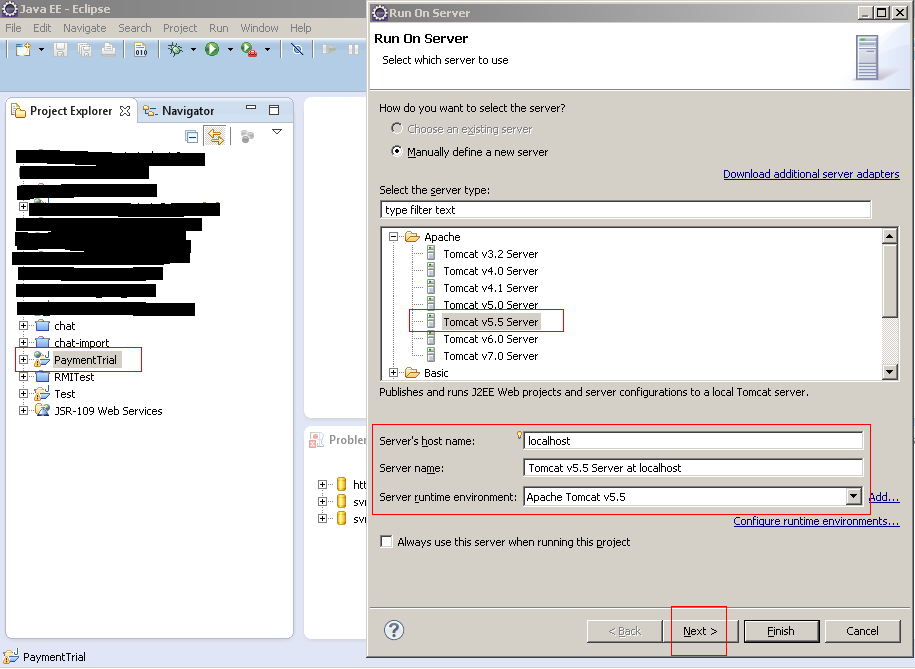
- Now, to execute the project, right click on the project. From the pop-up go to Run As → Run on Server (Alt + Shift + X, R). From the list shown, select your appropriate Apache Server version as done earlier. The three text boxes should appear as below:
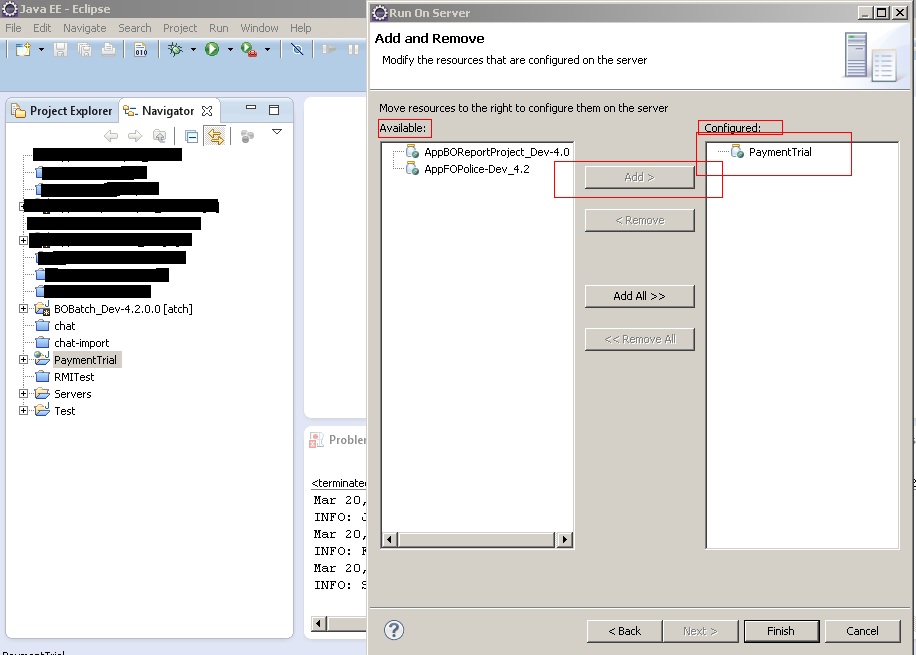
- Choose your project from the list of Available Projects in left panel and move it to Configured projects’ list by clicking on “Add >” button. As shown below:
- Click Finish. If all goes fine, the server should get started and logs should be visible in the Console view of Eclipse (And if you are lucky enough, your project should get started as well LOLzz):
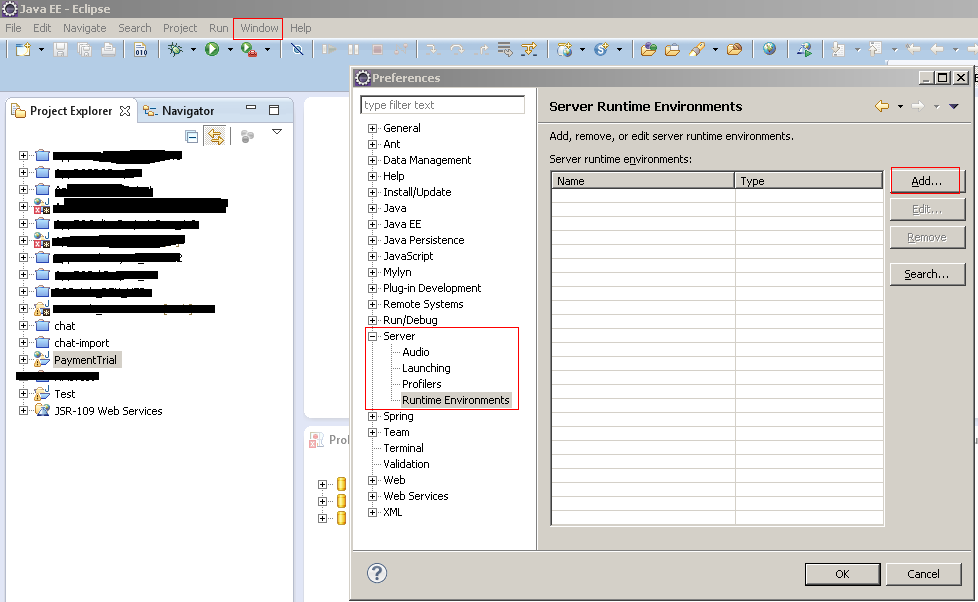
server -> runtime environments
Add Server Dialog

Tomcat Installation Directory
Click on Finish. The new run-time environment configuration should appear as below in the preferences menu:
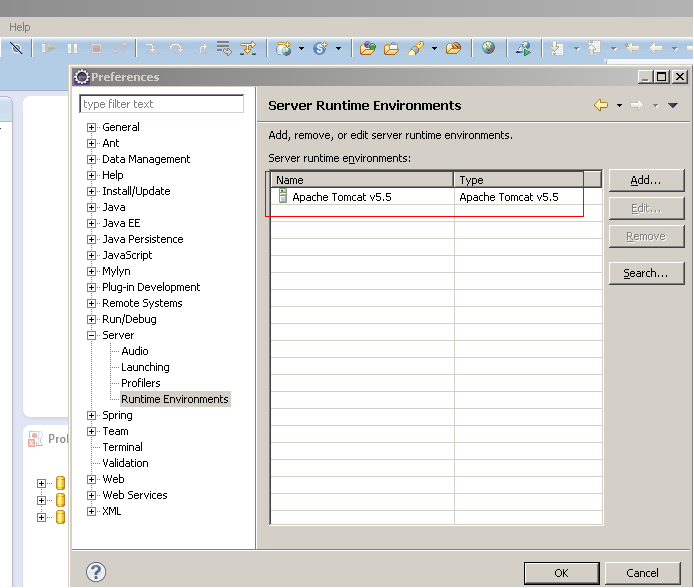
new run-time config
Select Apache server version
Here the Server runtime environment should be pre-populated with recently configured Run- time environment name (Apache Tomcat v5.5). Click “Next >”.
Configure projects

Server start-up and execution