Table of Contents
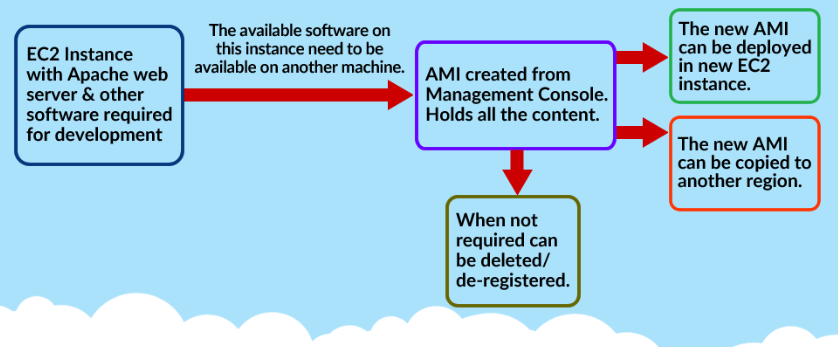
High-level Architecture
Step 1. Create an EC2 instance
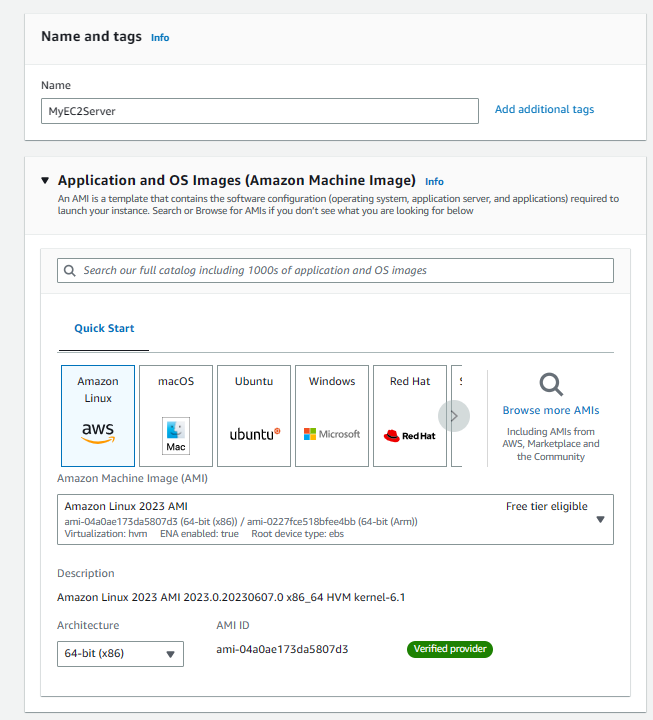
a. Create an EC2 instance with the following config
- Name: MyEC2Server
- AMI: Amazon Linux 2023 AMI
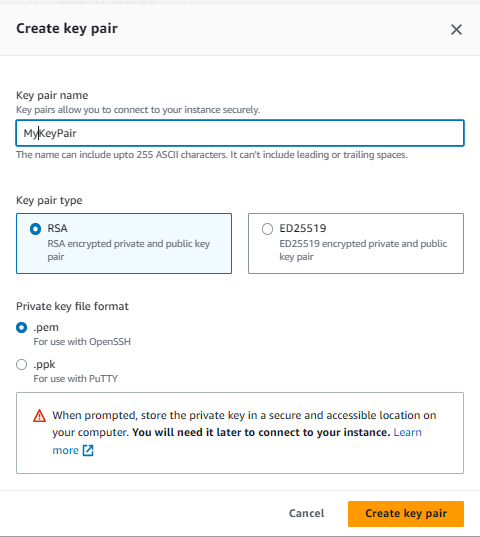
b. Create a Key Pair (pem extension), with name MyKeyPair
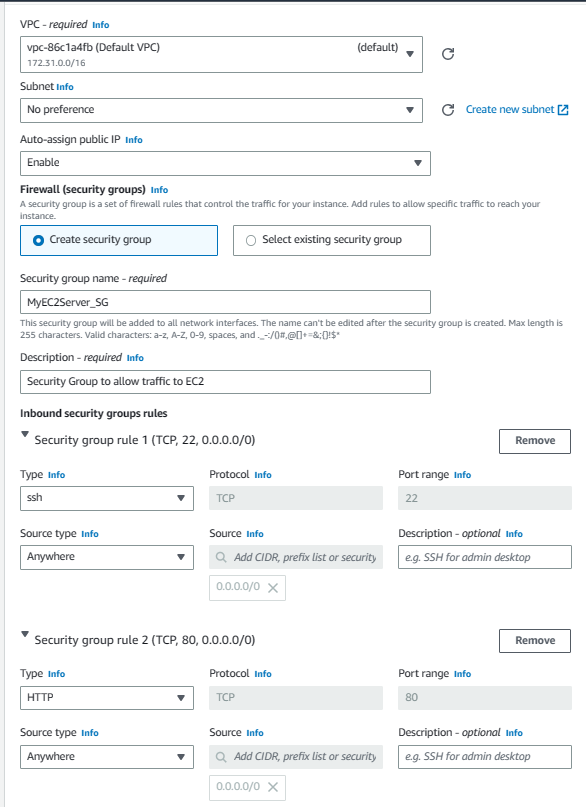
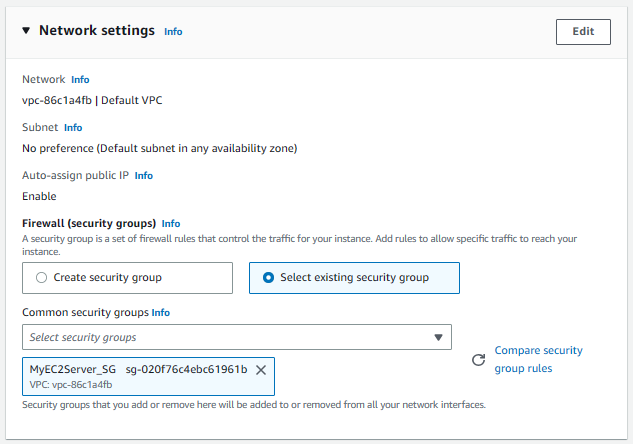
c. Create a Security Group named ‘MyEC2Server_SG’, to allow SSH and HTTP Traffic from anywhere.
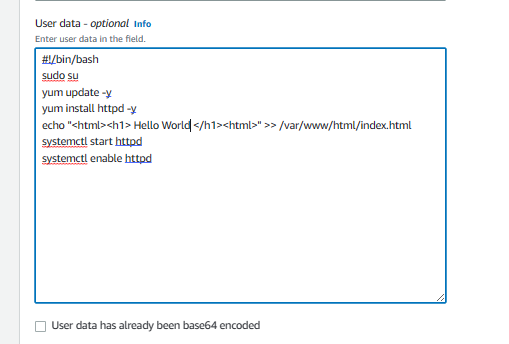
d. Add the following script to the User data Section. This is to install Apache Server and create an index.html file under /var/www/html folder with “Hello World”
|
1 2 3 4 5 6 7 |
#!/bin/bash sudo su yum update -y yum install httpd -y echo "<html><h1> Hello World </h1><html>" >> /var/www/html/index.html systemctl start httpd systemctl enable httpd |
e. Launch Instance
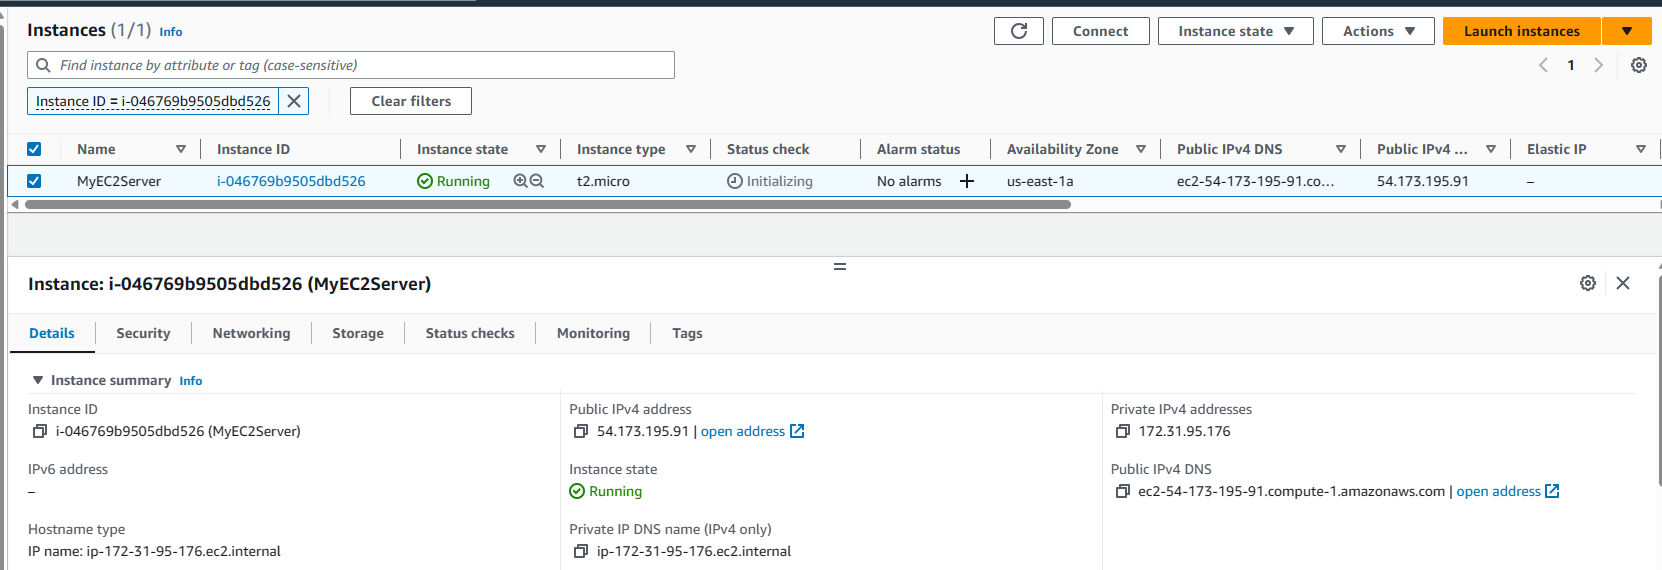
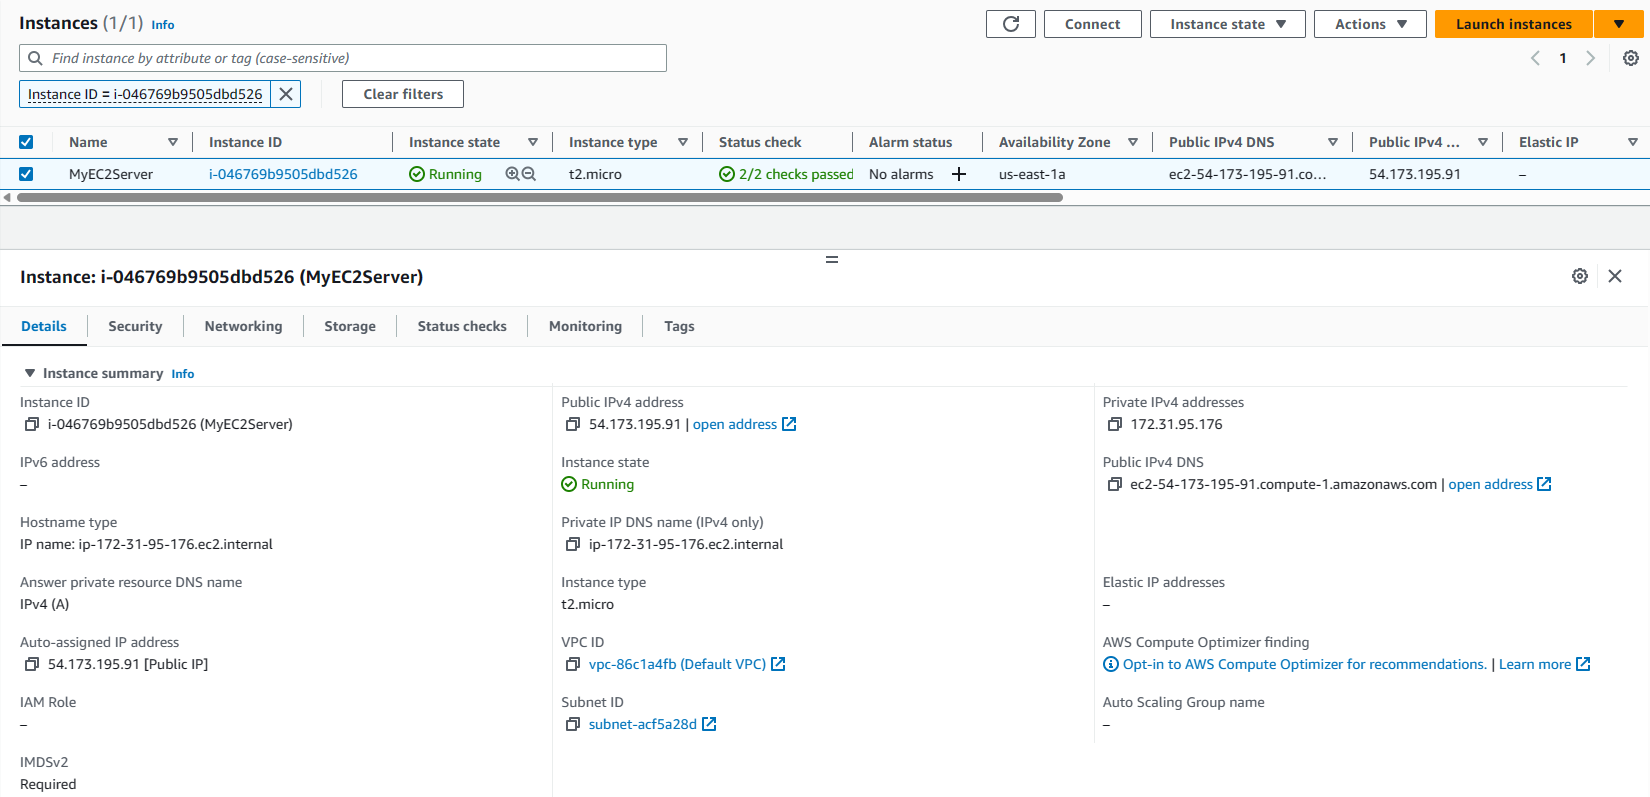
Note: If the Public IP of the instance is not opening any page, Make sure the URL Protocol is HTTP, not HTTPS. Please wait until the status check of the instance is transitioned from initializing to 2/2 checks passed. This may take up to 5 minutes. If the page still does not load, make sure to check the Security group’s inbound rule and see if the entry for HTTP exists or not.
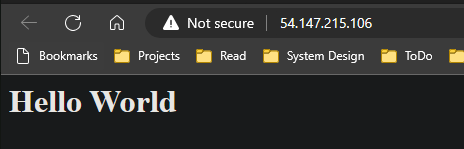
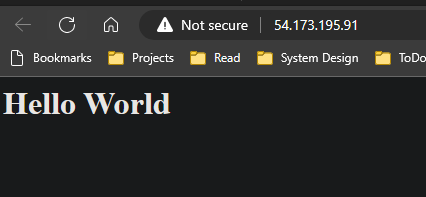
e. Once the instance is in a Running state and all the status checks passed. Try accessing the index.html by the following URL in the browser.
HTTP://<public_ip_address>
Step 2. Create an AMI
a. From the Actions dropdown, select Image and Templates > Create Image
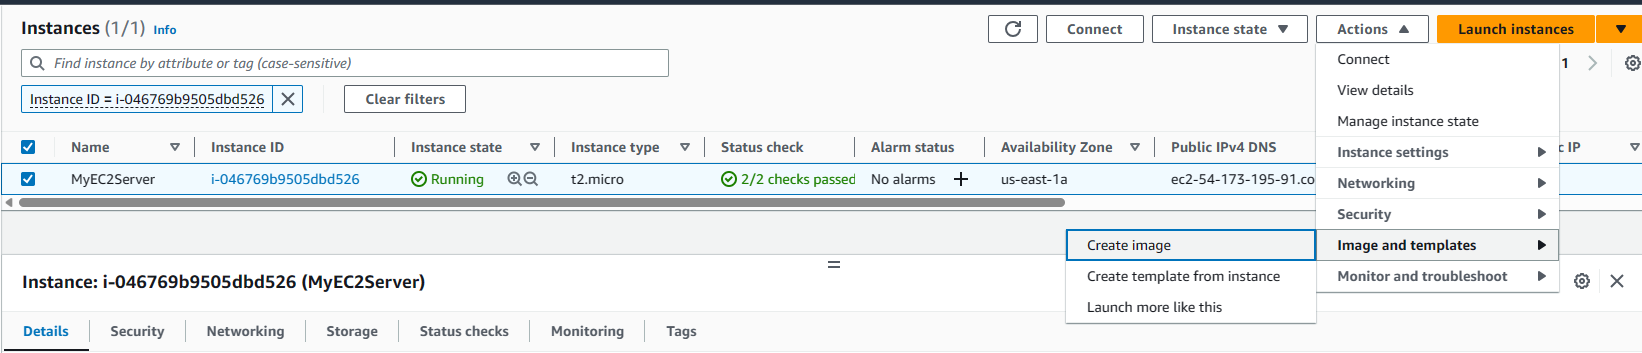
b.
Image Name: MyEC2Image
Image Description: My EC2 Image
and Click on Create Image
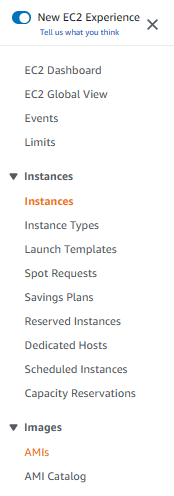
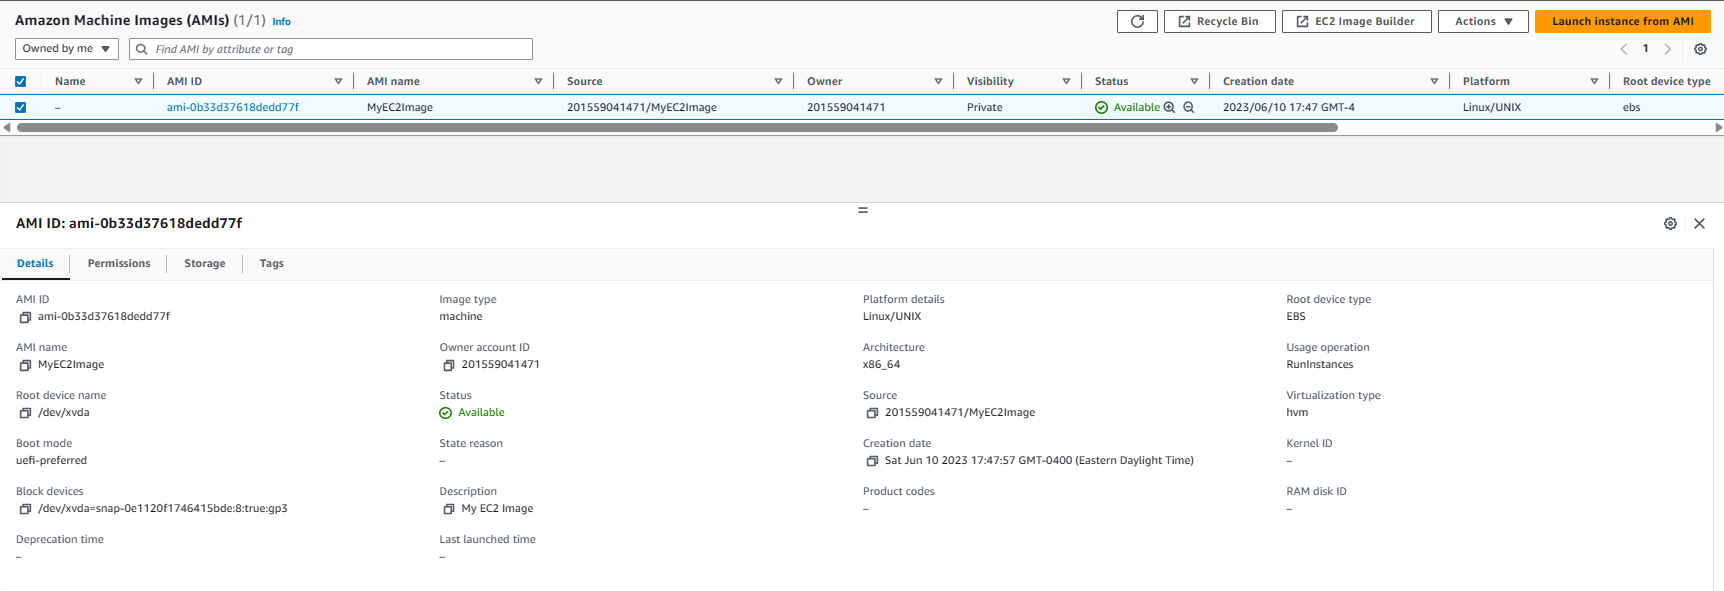
c. From the left-hand-side panel, select AMIs.
Wait for the status to be changed from Pending to Available

Status > Available

d. Once the status changed to Available, click on Launch Instances from AMI
Name: MyEC2AMIServer
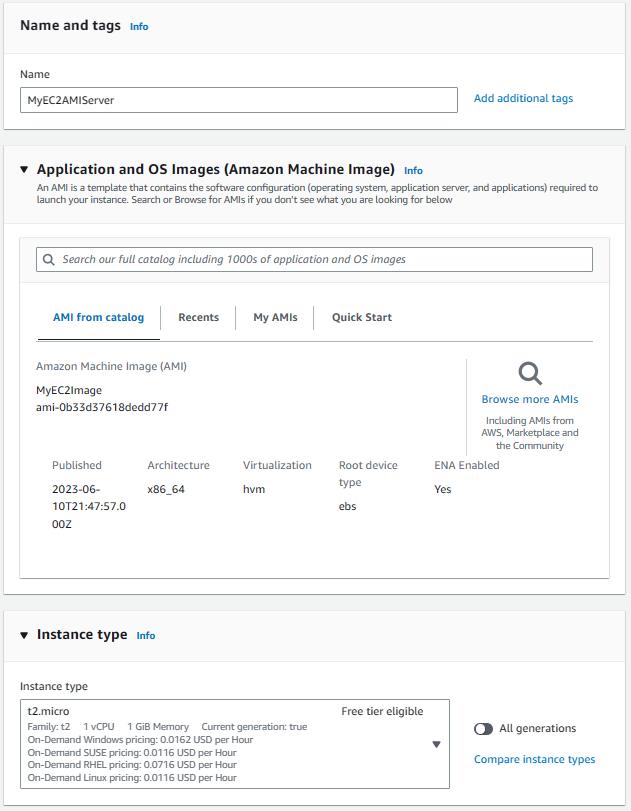
Select the keypair you previously created.
Select the security group you have previously created

e. Once the new instance is in a Running state and all the status checks have passed, try accessing the page by going to the public address.