Table of Contents
Introduction
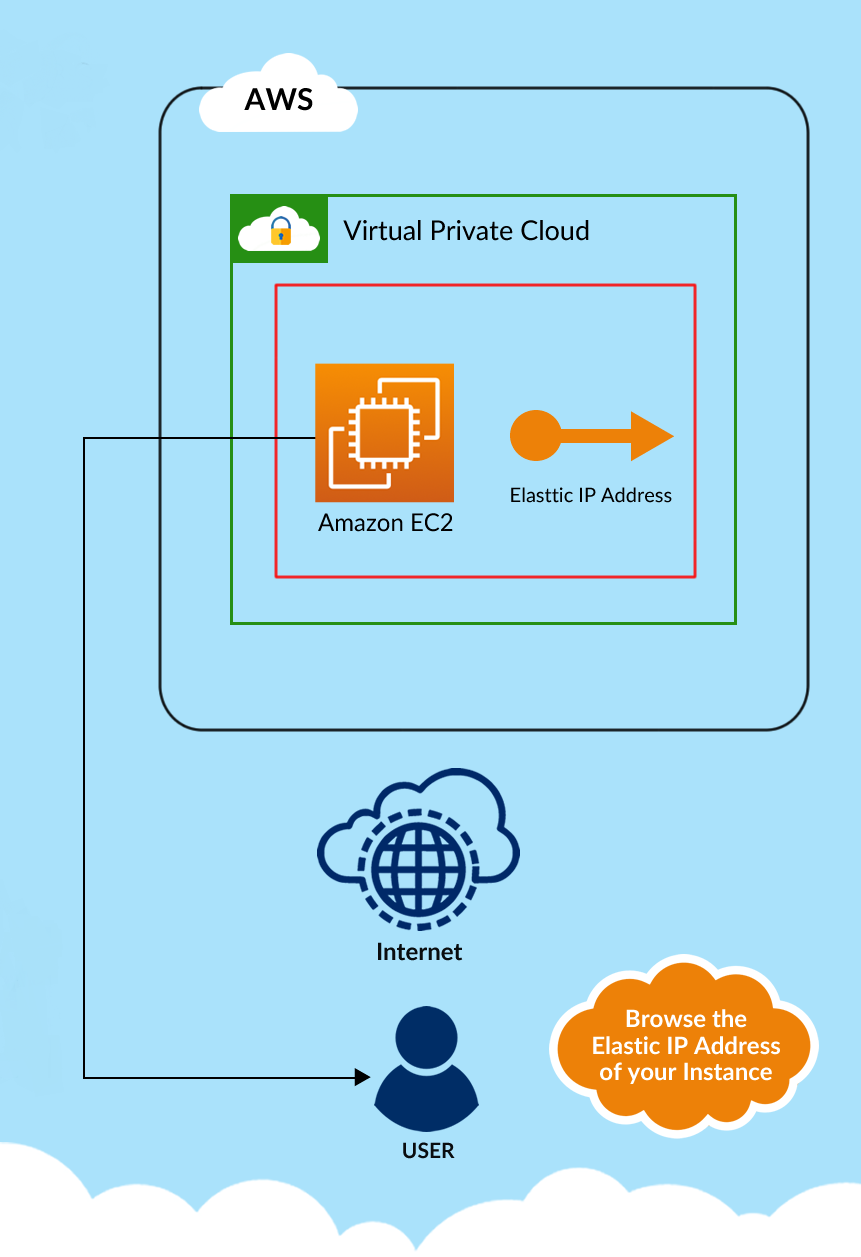
Elastic IP addresses are an essential component of Amazon Web Services (AWS), particularly when it comes to EC2 instances. Elastic IP addresses provide a static public IPv4 address that you can allocate to your instances. In this step-by-step guide, we will walk you through the process of allocating an Elastic IP address and associating it with an EC2 instance.
Benefits
Static Public IP
When you launch a new EC2 instance, it is assigned a dynamic public IP address by default. However, this IP address changes every time you stop and start the instance. Elastic IP addresses provide a static, persistent public IP that remains associated with your instance even if it is stopped or terminated. This makes it easier to establish consistent connections to your instances, especially when hosting websites, applications, or services that require a fixed IP address.
Reliability
Elastic IP addresses are highly reliable, as they are resilient to instance failures and are designed to work seamlessly with AWS infrastructure. If an EC2 instance fails or needs to be replaced, you can quickly remap the Elastic IP address to a new instance, ensuring uninterrupted service.
IP Whitelisting
Many applications and services require IP whitelisting for secure access. Elastic IP addresses enable you to set up access control lists (ACLs) and security groups to allow traffic from specific IP addresses. With a static Elastic IP, you can easily whitelist the IP address, providing secure and controlled access to your resources.
Elastic Load Balancing
Elastic IP addresses can be associated with AWS Elastic Load Balancers, which distribute traffic across multiple instances. By using Elastic Load Balancers in conjunction with Elastic IP addresses, you can ensure high availability, fault tolerance, and scalability for your applications.
Reverse DNS
Elastic IP addresses allow you to configure reverse DNS records, which are crucial for sending and receiving emails, establishing trust with other servers, and preventing emails from being flagged as spam. Reverse DNS enables you to create a pointer from the IP address to a domain name, enhancing the credibility and deliverability of your email communications.
AWS Resource Management
Elastic IP addresses are managed within AWS, allowing you to track, allocate, and associate them with your EC2 instances through the AWS Management Console, CLI, or APIs. This centralized management simplifies the process of managing your IP addresses and ensures that they are available for use whenever you need them.
Cost-Effective
While Elastic IP addresses are free to allocate, they incur costs if they are not associated with a running instance. To optimize costs, it is recommended to release the Elastic IP address when it is not in use or associate it with a running instance.
High-level Architecture
Steps
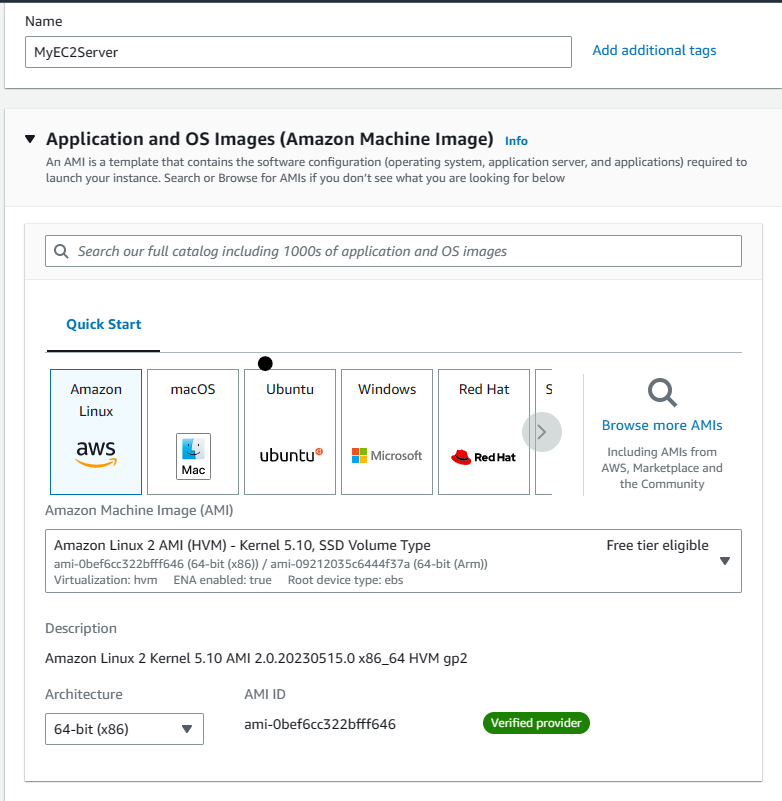
Step 1. Launch EC2
a. Open AWS Console and Launch the EC2 instance with the configurations indicated below
Name: <INSTANCE_NAME>
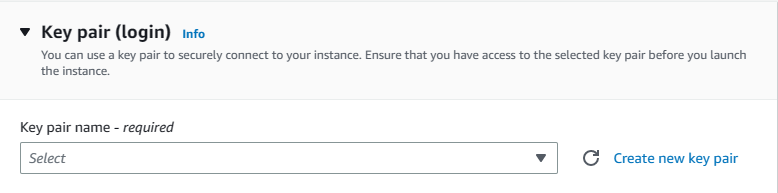
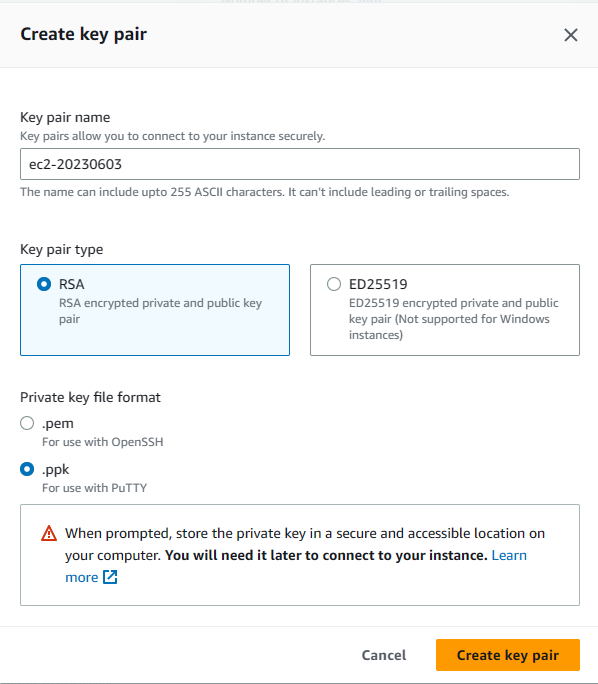
b. Create a Key Pair with .ppk file extension. Download and Save it on your computer.
c. Create a Security Group and add inbound rules to allow SSH and HTTP traffic from anywhere.
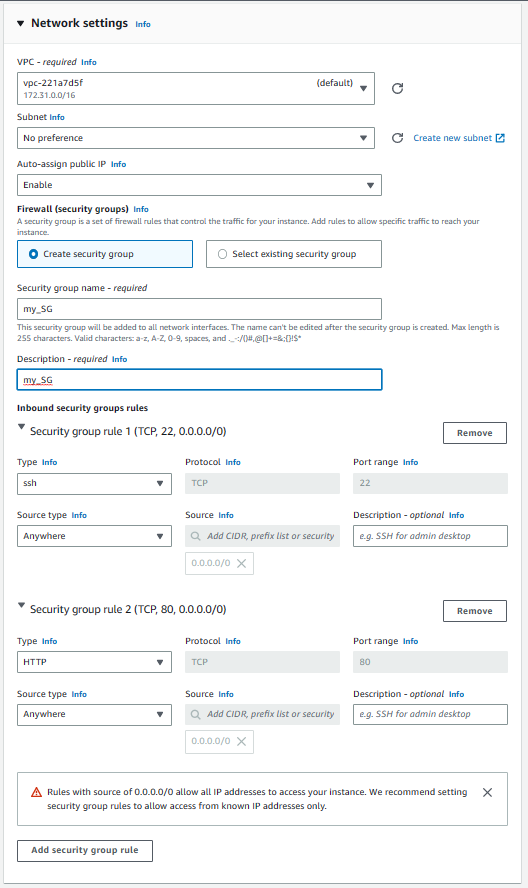
d. Review and Launch Instance.
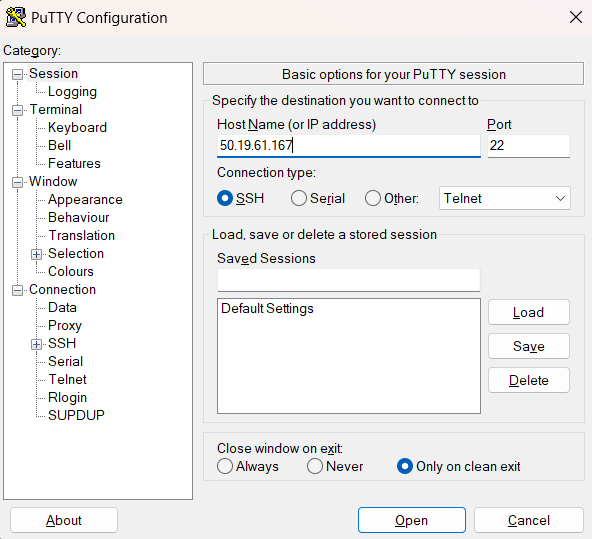
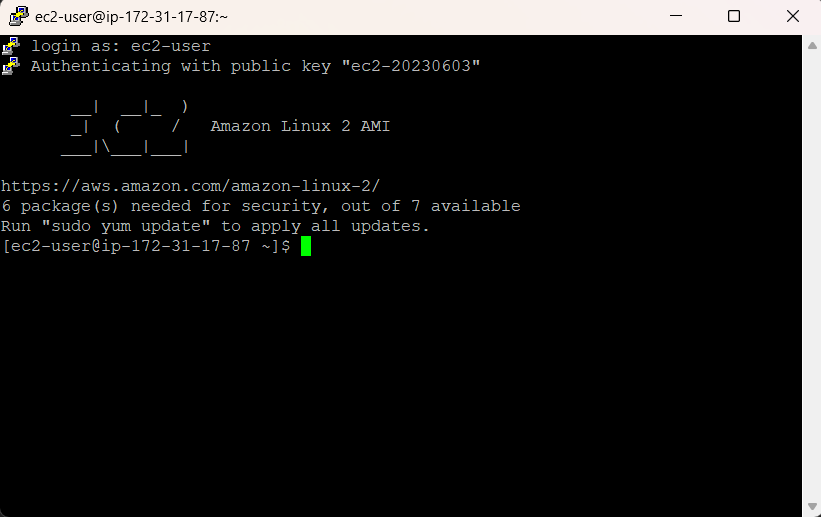
Step 2. Login to EC2 instance using Putty
a. Copy the Public IP of the instance created in the previous instance and paste it into Host Name field.
b. In Category, Go to Connection > SSH > Auth > Credentials, locate the key pair file (ppk file extension) and add it to the “Private Key file for authentication”
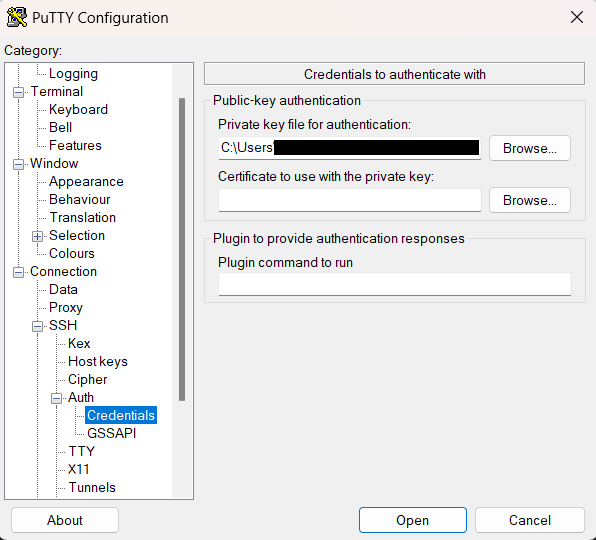
c. Click “Open”.
d. Login as “ec2-user”
Step 3. Install and Start Apache HTTP Server
|
1 2 3 4 5 6 |
sudo su yum -y update yum install httpd systemctl start httpd systemctl enable httpd systemctl status httpd |
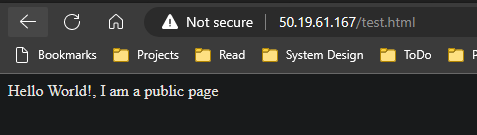
Step 4. Create a test.html and access it via browser
a. Run the following commands on terminal to navigate to /var/www/html and open nano editor
|
1 2 |
cd /var/www/html/ nano test.html |
b. Copy and paste the following content in the nano editor
|
1 |
<HTML>Hello World!, I am a public page</HTML> |
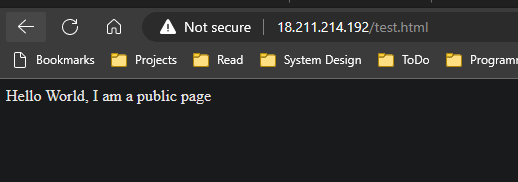
c. Access the page using the public IP address
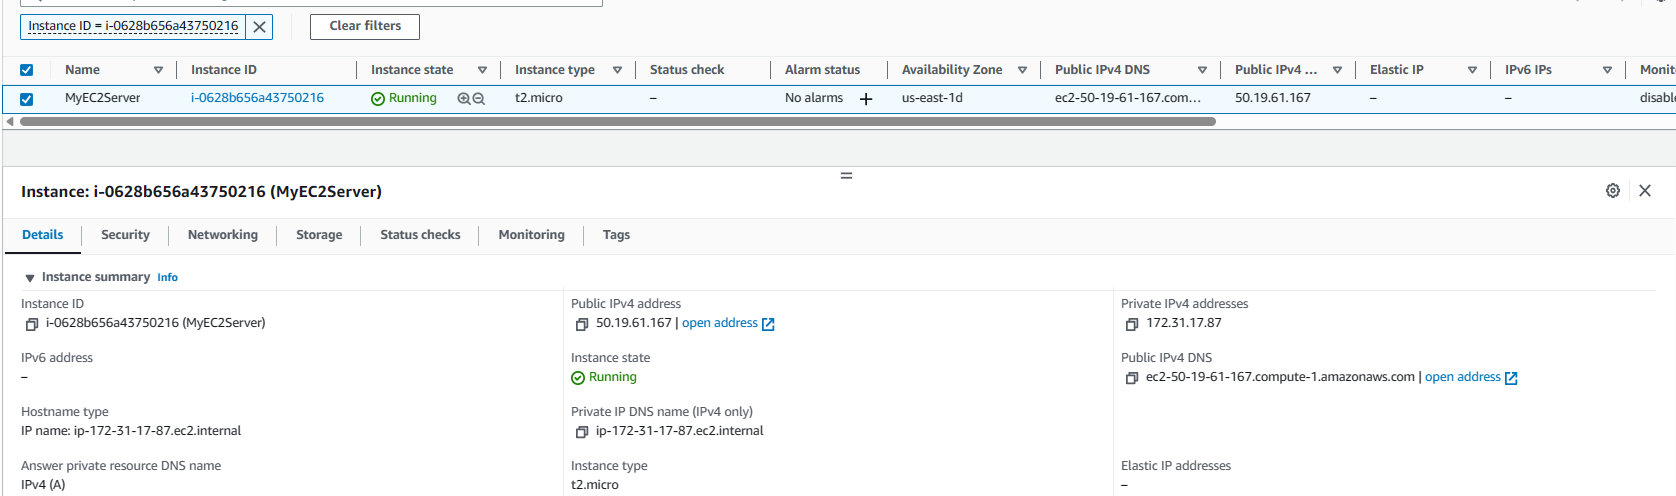
Notice the public IP address of the instance.
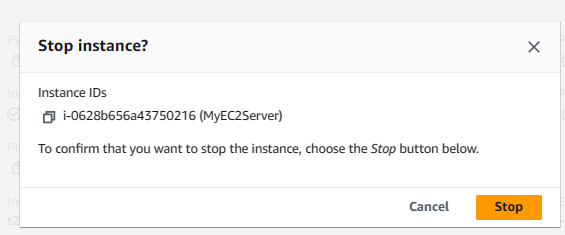
Step 5. Stop and Start the instance.
a. Select the instance, and select Stop instance action from the Instance state dropdown.

b. Click Stop
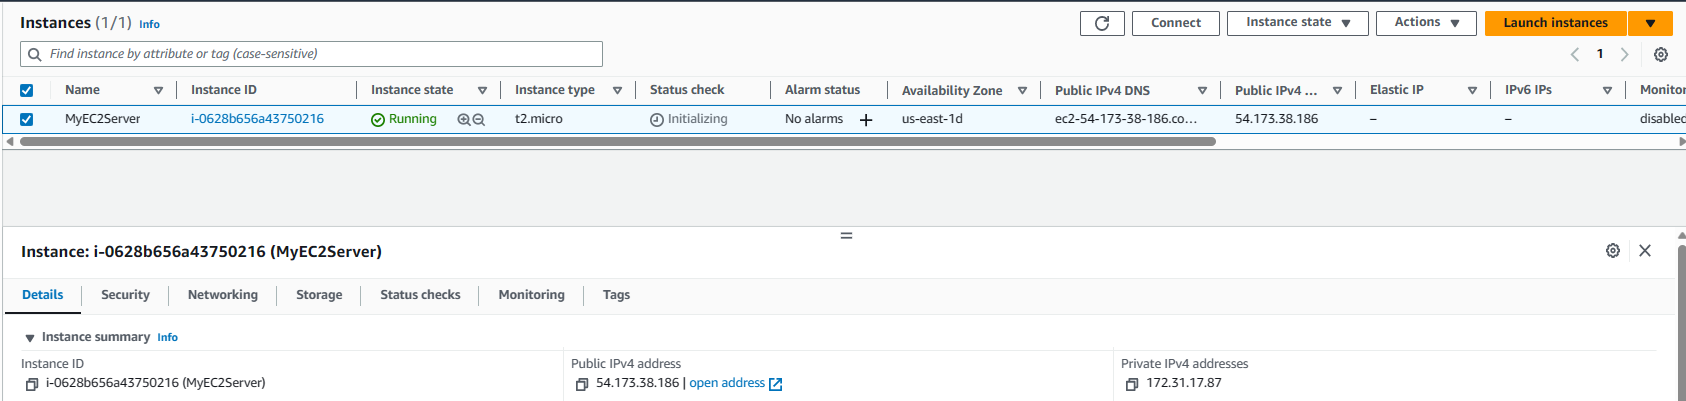
c. Start the instance by again selecting the instance and selecting Start Instance action from the Instance state drowdown.
d. Once the instance state is changed to Running, notice the public IP address. The public address has been assigned to the instance.
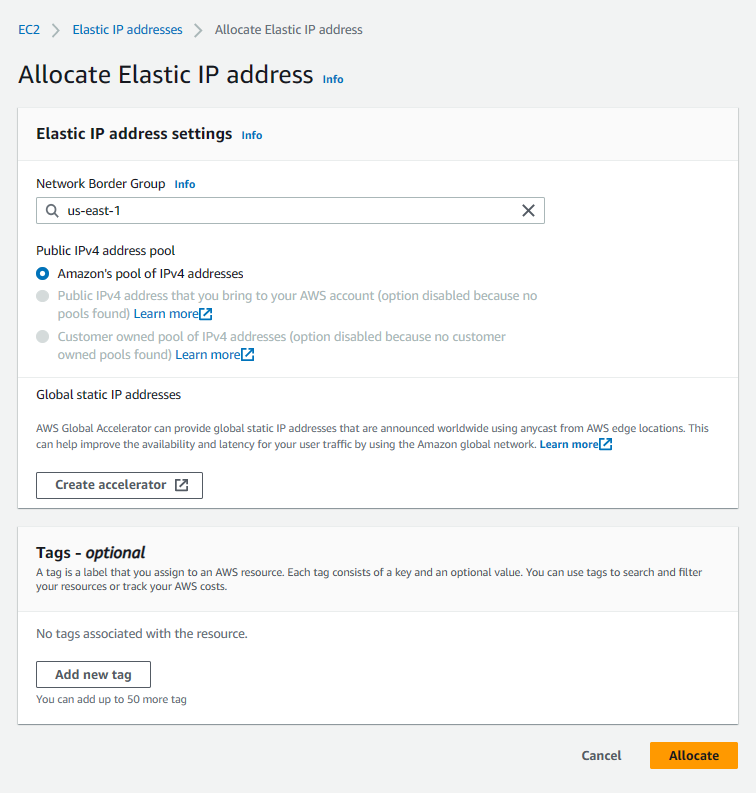
Step 6. Allocate Elastic IP address and Attach it to the instance
a. Goto AWS Console, EC2 > Elastic IPs > Allocate Elastic IP Address
b. Select us-east-1 and Amazon’s pool of IPv4 addresses, and click allocate.
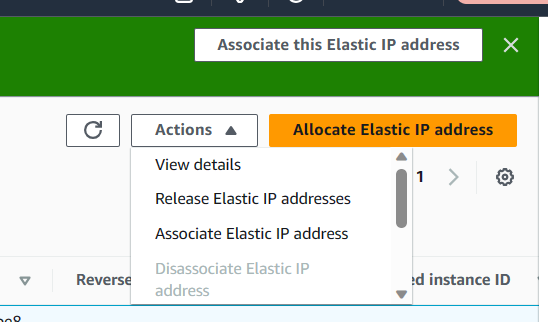
c. From Actions dropdown menu, select Associate Elastic IP address
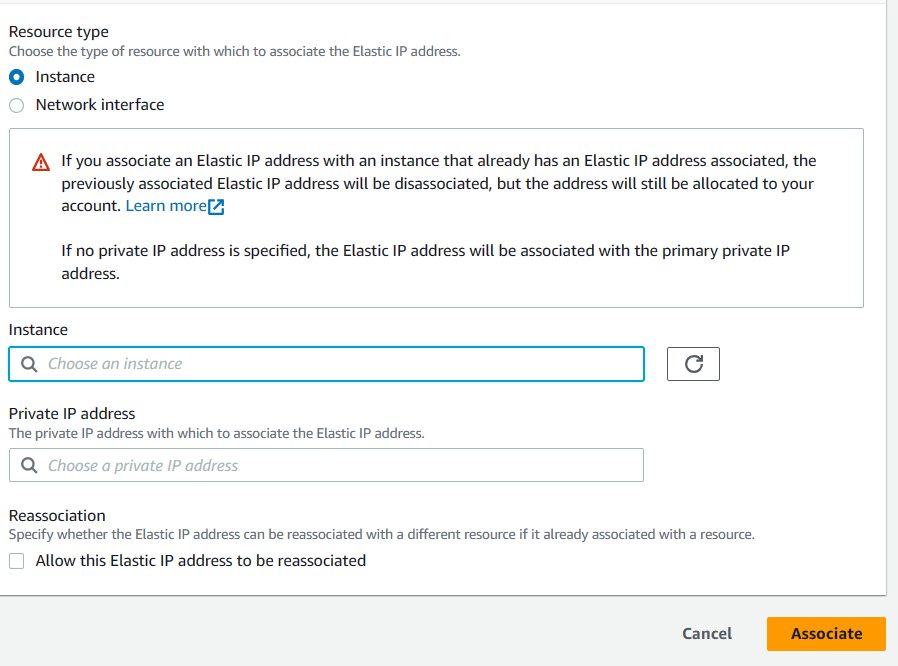
d. Select the instance and click associate.
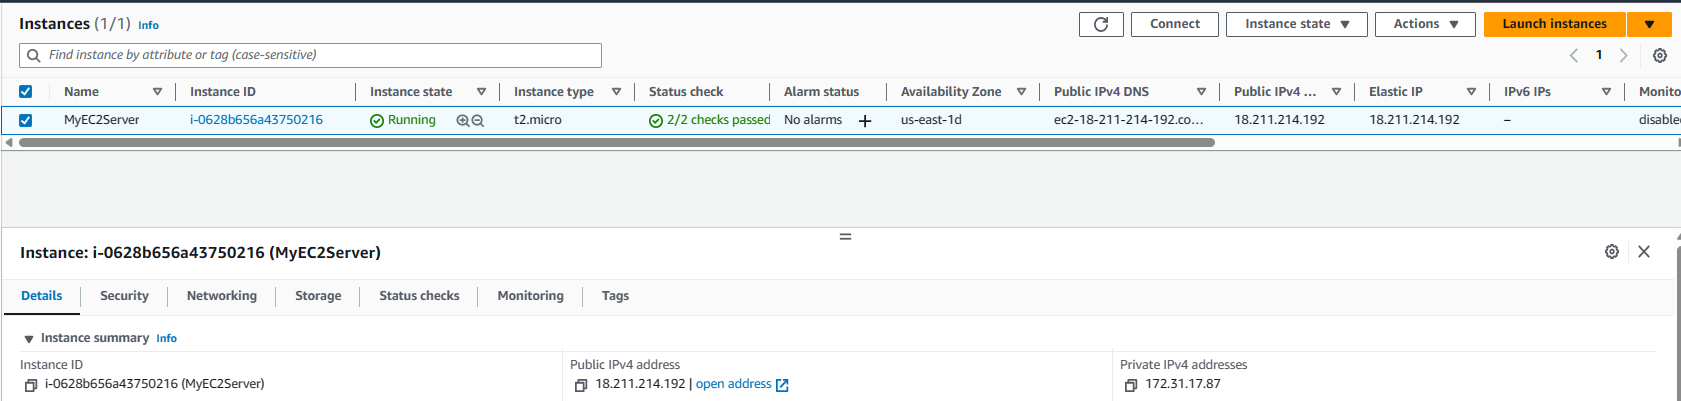
e. The Elastic Address has been associated with the instance.

f. Verify the same by going back to the EC2 instance and checking the public IP address. It should be same as the Elastic IP address you just created.
g. Access the page using the public IP address
Conclusion
Allocating and associating an Elastic IP address with an EC2 instance in AWS is a straightforward process that provides you with a static public IP address for your instance. This guide has walked you through the step-by-step process of allocating an Elastic IP address and associating it with an EC2 instance. By following these steps, you can ensure that your instances have a persistent public IP address, enabling easier connectivity and ensuring your applications and services remain accessible.